In This Guide:
Related Guides:
Access and Administration
Browser Configuration - Chrome
Recommended Settings for RouteOne
Ensure RouteOne is an allowed site for Cookies, JavaScript, and Pop-ups.
By default, Chrome allows cookies and JavaScript, but blocks pop-ups.
To check these settings, take the following steps:
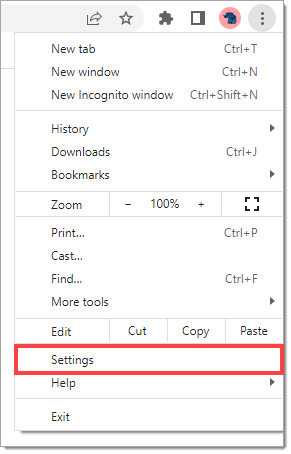
In the upper right-hand corner of the browser, click the icon of three vertical dots, and select ‘Settings’ from the dropdown menu that appears.
Accessing ‘Site Settings’
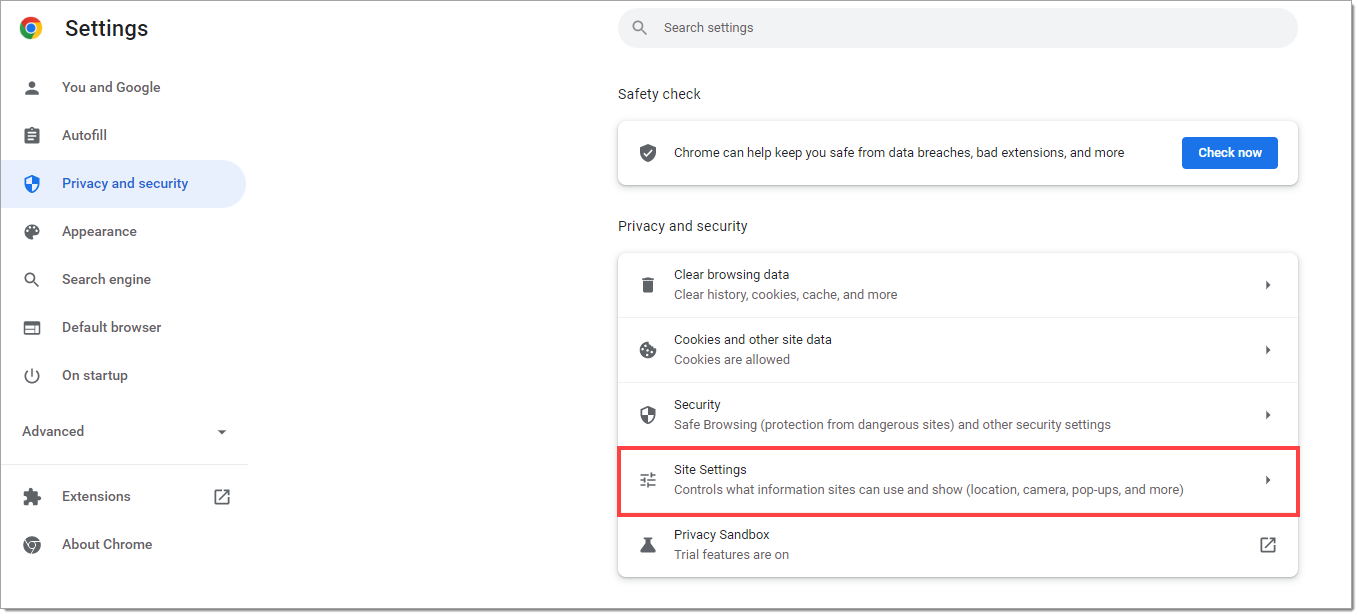
From the left menu, select ‘Privacy and Security,’ then go to ‘Site Settings.’
Cookies
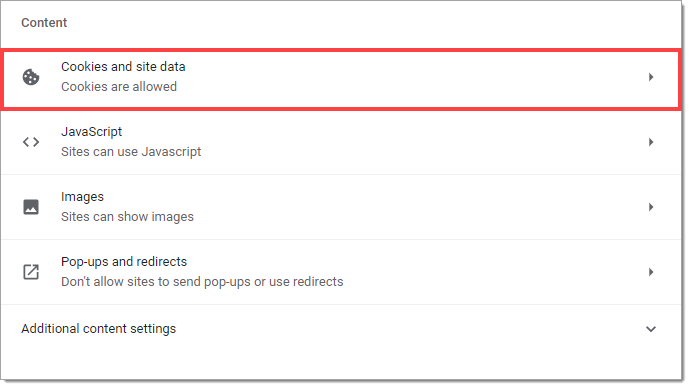
Under the ‘Content’ section, click ‘Cookies and site data.’
Cookies are used by RouteOne for managing logins and Multi-Factor Authentication (‘MFA’) registration, and therefore must be enabled for RouteOne.
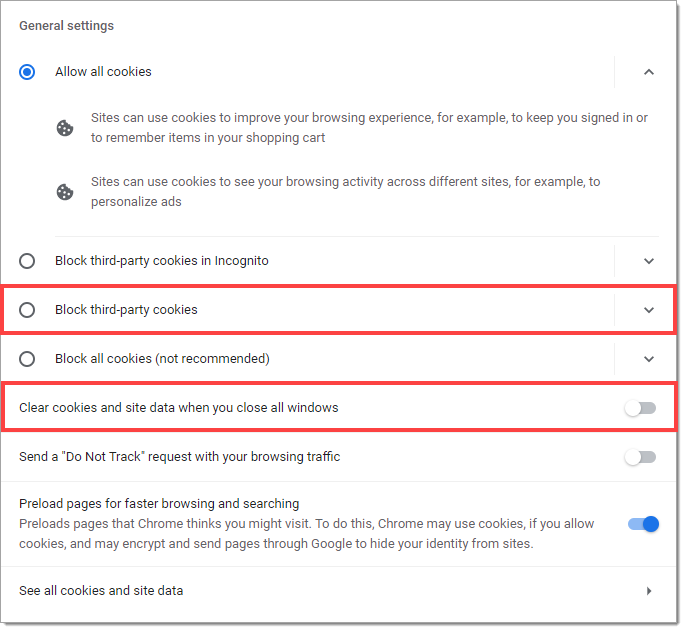
By default, the Chrome setting ‘Allow all cookies,’ is selected.
It is recommended this setting be enabled for RouteOne usage.
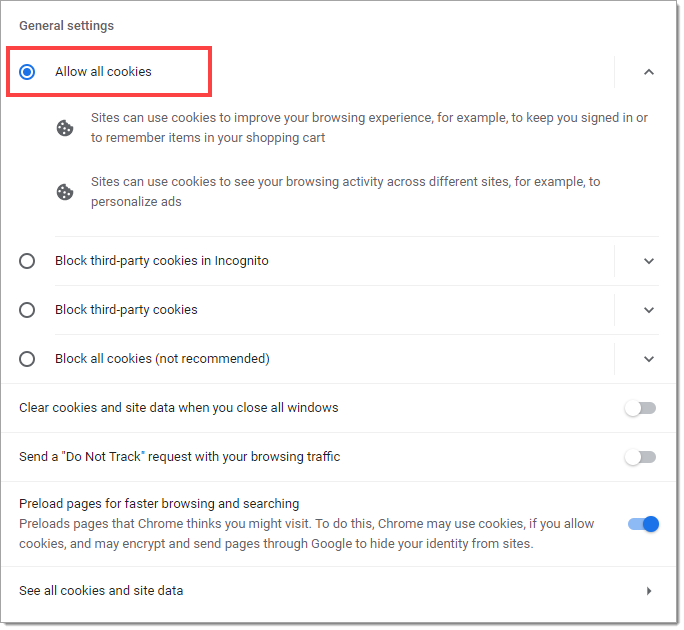
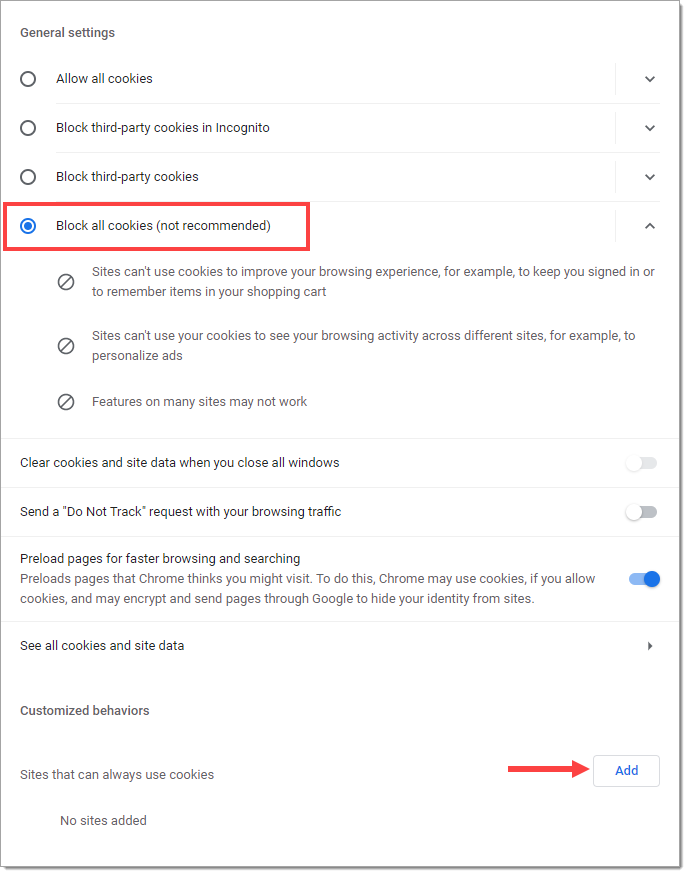
If your dealership’s setup requires cookies to be blocked, then you will need to add RouteOne as an allowed site.
Click the ‘Add’ button on the ‘Sites that can always use cookies’ line as seen below:
Enter ‘[*.]routeone.net’ into the ‘Add a site’ window and click ‘Add.’
RouteOne will be listed in the ‘Sites that can always use cookies’ list, and the wildcard notation of [*.] will ensure that everything related to RouteOne.net will be allowed.
![The ‘Add a site’ pop-up window with ‘[*.]routeone.net’ entered in the ‘Site’ field, highlighted by a box, and an arrow pointing to the ‘Add’ button.](https://www.routeone.com/sites/default/files/images/ChromeConfig_US_6.0.png)
Make sure the option to ‘Clear cookies and site data when you quit Chrome’ is disabled.
If this setting is enabled, it will delete MFA registration and require MFA registration each time you login.
For dealers accessing RouteOne via a Branded Interface, such as the Ford Toolkit or the Ally portal, etc., the option to ‘Block third-party cookies’ should be disabled to ensure that these Single Sign-On options function properly.
JavaScript
Return to the ‘Site Settings’ page.
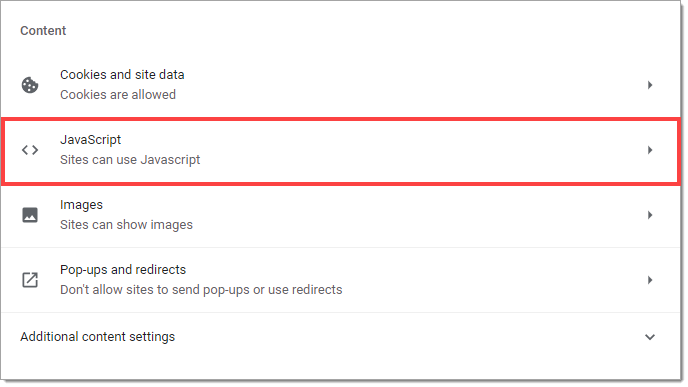
Under ‘Content,’ click ‘JavaScript.’
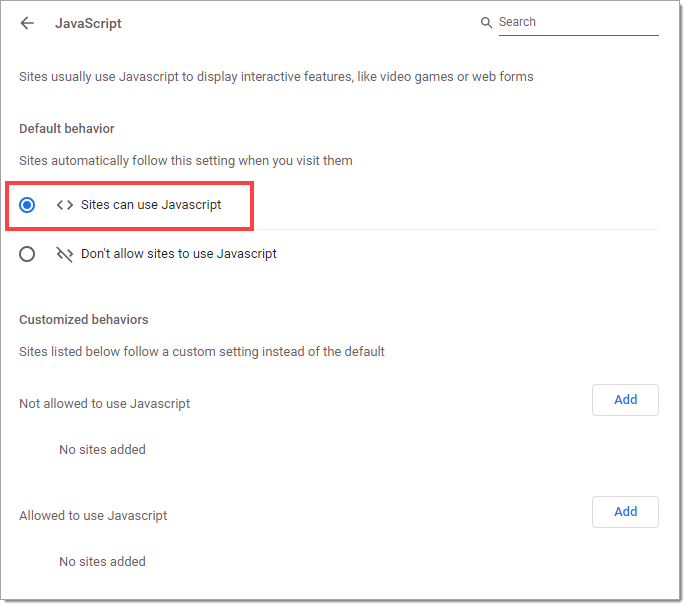
JavaScript is used extensively in RouteOne, and RouteOne cannot function without it.
By default, JavaScript is set to be enabled in Chrome.
It is recommended this setting be enabled for RouteOne usage.
If your dealership’s setup requires JavaScript to be blocked, then you will need to add RouteOne as an allowed site.
Click the ‘Add’ button on the ‘Allowed to use Javascript’ line as shown here:

Enter ‘[*.]routeone.net’ into the ‘Add a site’ window and click ‘Add.’
RouteOne will be listed in the ‘Allowed to use Javascript’ list, and the wildcard notation of [*.] will ensure that everything related to RouteOne.net will be allowed.
![The ‘Add a site’ pop-up window with ‘[*.]routeone.net’ entered in the ‘Site’ field, highlighted by a box, and an arrow pointing to the ‘Add’ button.](https://www.routeone.com/sites/default/files/images/ChromeConfig_US_11.0.png)
Pop-ups
Return to the ‘Site Settings’ page.
Under ‘Content,’ click ‘Pop-Ups and redirects.’
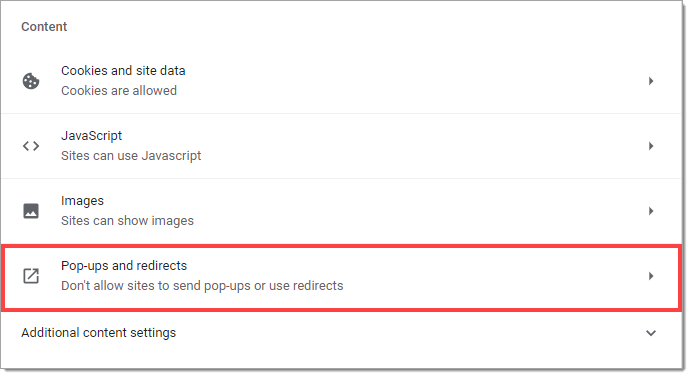
RouteOne uses pop-ups as part of standard operation: to deliver information, confirmation windows, etc. If they are blocked, some features of RouteOne will not work.
By default, pop-ups are blocked in Chrome. At dealer discretion, you can allow pop-ups globally by clicking the toggle switch.
If the dealership’s setup requires pop-ups to be blocked, RouteOne will need to be added as an allowed site.
Click the ‘Add’ button on the ‘Allowed to send pop-ups and use redirects’ line as shown here:
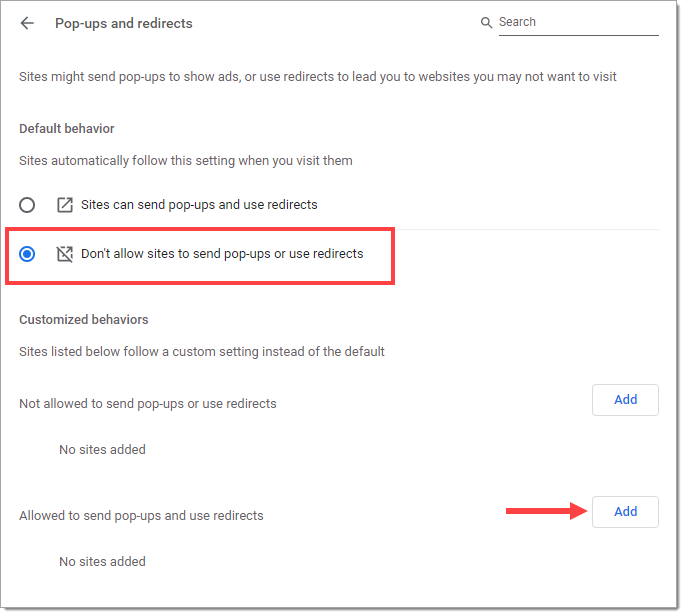
Enter ‘[*.]routeone.net’ into the ‘Add a site’ window and click ‘Add.’
RouteOne will be listed in the ‘Allowed to send pop-ups or use redirects’ list, and the wildcard notation of [*.] will ensure that everything related to RouteOne.net will be allowed.
![The ‘Add a site’ pop-up window with ‘[*.]routeone.net’ entered in the ‘Site’ field, highlighted by a box, and an arrow pointing to the ‘Add’ button.](https://www.routeone.com/sites/default/files/images/ChromeConfig_US_14.0.png)
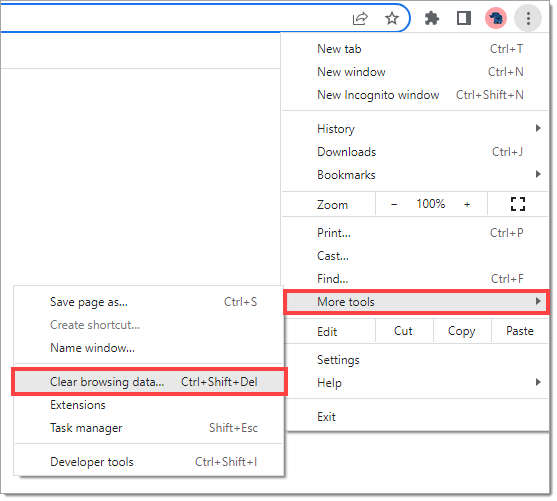
Troubleshooting
In the event that the Chrome browser is not functioning properly while using the RouteOne system, it may be necessary to clear the browser Cache and Cookies.
Issues such as RouteOne failing to load, or repeatedly getting logged out shortly after logging in, can often be resolved by taking these steps.
In the upper right-hand corner of the browser, click the icon of three vertical dots.
From the dropdown menus, select ‘More tools,’ followed by ‘Clear browsing data.’
Alternatively, when you are in the Chrome browser, you may use the keyboard shortcut ‘Ctrl + Shift + Del.’
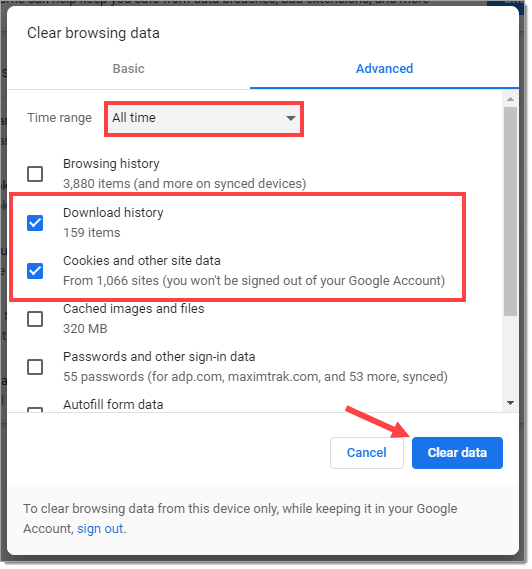
Ensure the ‘Time range’ is set for an appropriate time period – specifically, from before whenever the issue started. If it is not clear when that is, select ‘All time’ from the dropdown.
Select ‘Cookies and other site data’ and ‘Cached images and files.’
Browsing history does not need to be selected. This is at your discretion.
‘Clear browsing data’ has both ‘Basic’ and ‘Advanced’ views. ‘Advanced’ offers more options of items that can be deleted. However, the only items that should be deleted are Cache and Cookies, which appear in the ‘Basic’ view.
Click ‘Clear data,’ then restart Chrome.
ROUTEONE SUPPORT
Hours (EST)
Monday - Friday: 6:00am – Midnight
Saturday: 9am – 9pm
Can’t find what you need?
Try our search
