In This Guide:
Related Guides:
Access and Administration
User Information and Permissions
About the ‘Users’ Page
The Dealership System Administrator (DSA) for your dealership will need to make any changes to user information and permissions.
- To locate the DSA for your dealership, click the ‘Gear’ icon in the upper right hand corner of the screen. A pop-up window will appear, and your DSA will be listed at the top of the window. If the DSA position needs to be reassigned, contact RouteOne Support at 866.768. 8301.
From the ‘Admin’ top navigation tab, select ‘Users’ from the dropdown menu to navigate to the ‘Users’ page.
From here you will be able to see all users affiliated with your dealership and their current RouteOne permissions.
You can also create a new user, associate an existing user with your dealership, or edit an existing user.

Creating a New User
From the ‘Admin’ top navigation tab, select ‘Users’ from the dropdown menu to navigate to the ‘Users’ page.
Click the ‘Create User’ button on the ‘Users’ page. You will be navigated to the ‘Create User’ page.
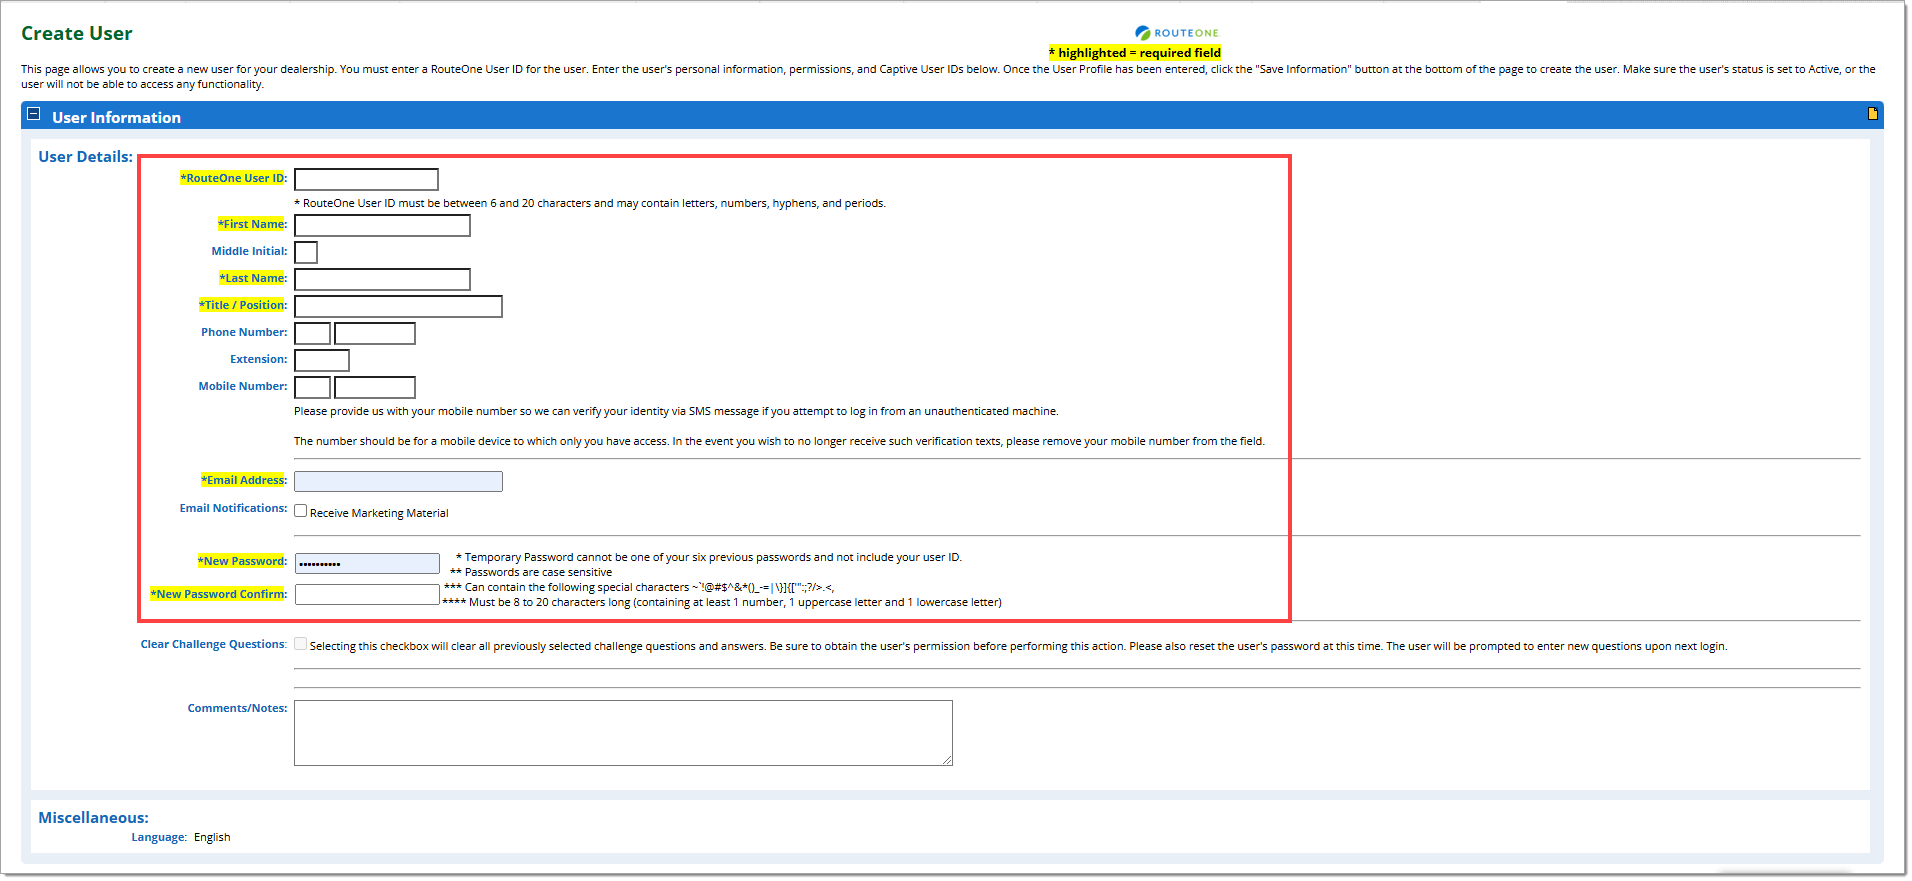
User Information
Input all the required information, which is noted by an asterisk ‘*’ and is highlighted in yellow.
Important:
Make note of the ‘RouteOne User ID’ you input for the user, as you will need to communicate that information to the new user.
You will need to input a temporary password for the new user in the ‘New Password’ and ‘New Password Confirm’ fields. Also, make note of the temporary password you input, as you will need to communicate that information to the new user as well.
The email address for the account must be a private email. It cannot be a shared email, as the token codes and temporary passwords may be inaccessible.
After inputting all necessary information and permissions, remember to click the ‘Save Information’ button at the bottom of the page.
Permissions - General, DSA
| general permissions | description |
|---|---|
User Status | You can set the user’s overall status as either Active or Inactive. |
Dealer Group Administration | User has access to perform administrative tasks for all dealerships within that dealer group. |
Dealership System Administration (DSA) | User has access to perform administrative tasks for the dealership within RouteOne, such as:
All functions available to the DSA can be found under the ‘Admin’ tab in the top navigation in the system. |

Permissions - Credit, Compliance, Desktop, Deal Jacket
| Credit Application and Compliance Permissions | description |
|---|---|
Deal Manager: | User has access to view the ‘Deals’ tab and access Deal Manager. Selecting ‘Yes’ allows complete access to personal/private customer data in credit applications. Selecting ‘No’ prohibits retrieval/access to personal/private customer data after a credit application is saved or sent. |
SecureDocOne: | User has access to documents stored in SecureDocOne. Selecting ‘Yes’ and checking ‘Archived Document Access’ allows complete access to archived personal/private customer data. Selecting ‘No’ prohibits complete access to this type of data. |
Create & Save Credit Application | User has access to create a new credit application, save it, sign it, and edit it, but does not have permission to submit the credit application. |
Submit Credit Application | User has access to submit the credit application to finance sources for decisioning. |
Create Customers | User can create customer profiles in their dealership, where they can track all deal jackets and applications associated with that customer. |
Edit Customers | User can edit customer profiles in their dealership. |
Decision Summary Access | User has access to see the details of the call back / decision received from the finance source. |
Run Reports | User has access to the reports in the Reports tab and can run them for the dealership. |
View Rates and Forms | User has access to the rate sheets and forms uploaded by finance sources in that tab. |
Lead Manager Access | User has access to the Lead Manager page and any leads listed there. |
Compliance Dashboard Access | User has access to the Compliance Dashboard. |
Request Credit Reports | User has access to submit a request for a credit report, but does not have permission to view the actual credit report that is returned. |
Request & View Credit Reports | User has access to submit a request for a credit report and see the actual credit report that is returned. |
IDOne: | User has access to perform identity verification checks on customers. |
IDOne: | If a customer’s identity verification check results in a ‘caution’ or ‘failed’ status and the dealer determines that the caution or fail is unwarranted, then they can request a manual review of the customer. A user with this permission has permission to manually override the ID verification result. Users will be notified via email when a transaction needs to be reviewed. Important: The Dealer System Administrator should verify that the user’s email address saved within RouteOne is correct. |
Enter Cash/Other Deal | User has access to create Cash Deals in RouteOne. |
Vehicle Values Access | User has access to request vehicle values, as well as view pulled vehicle values. |
Payoff Quote Access | User has access to submit payoff quote requests to participating finance sources. |
Reviewer for Dealer Participation Certification Form | User has access to review and approve the Dealer Participation Certification Form that has been filled out for a credit application. |
| desktop permissions | DESCRIPTION |
|---|---|
Deals: | A desktop filter that shows the user all deals without credit and compliance. |
Deals: | A desktop filter that shows the user all deals with credit and compliance. |
| DEAL JACKET PERMISSIONS | DESCRIPTION |
|---|---|
Deal Structure | User has access to the Deal Structure page, and will be able to show or hide the Deal Structure page as desired. |

Permissions - eContracting
| ECONTRACTING PERMISSIONS | DESCRIPTION |
|---|---|
Deal Manager: | Minimum permission required for eContracting. Required to view credit applications on the Deal Manager page. |
Create & Save Credit Application | Minimum permission required for eContracting. User has access to create a new credit application, save it, sign it, and edit it, but does not have permission to submit the credit application. |
General Contracting | Minimum permission required for eContracting. Required to create a contract worksheet, validate with the finance source, generate contract documents, facilitate the eSignature process, and perform a credit application switch. |
Delete Contracts | Required to delete contracts and request an Authoritative Copy Conversion (ACC). |
Sign Contracts | Required to sign an eContract document on behalf of the dealership. |
Assign Contracts | Required to assign a contract to the finance source. |
Distribute Contracts | Required to distribute a contract package to the finance source. |
Paper Out® Contract | Required to Paper Out® a contract package. |

Permissions - Signatures Only
A user with permissions that are limited to applying signatures will only be able to:
- Print review copies
- Sign the contract
- Sign the credit application (if applicable)
- Print the final completed copy of the contract, with signatures applied
In Contract Manager, a user with permissions that are limited to applying signatures will only be able to see contracts with the following statuses:
- Contract Generation Complete
- Review Copy Printed
- Contract Signatures in Process (Authoritative Copy Created)
- Contract Signed
- Completed Copy Printed
To limit a user’s permissions so that they will only be able to sign contracts and credit applications (if applicable):
- Select ‘No - Prohibit subsequent retrieval/access to personal/private customer data after credit applications is saved/sent.’
- To allow a user to sign credit applications, select the ‘Create & Save Application’ permission.
- To allow a user to sign contracts, select the ‘Sign Contracts’ permission.

Permissions - Digital Retail Services
| DIGITAL RETAIL SERVICES PERMISSIONS | DESCRIPTION |
|---|---|
Deal Manager: | User has access to view all new credit applications submitted from Digital Retail in the ‘Deal Manager’ page and the ‘App Manager’ page. |
Dealership System Administration (DSA) | User has access to the ‘Online Credit Application Configuration’ page, has the ability to view all new credit applications in the ‘Deal Manager’ page, the ‘Lead Manager’ page, and the ‘App Manager’ page. |
Lead Manager Access | User has access to view all new credit applications submitted from Digital Retail in the ‘Lead Manager’ (except applications that have been submitted to finance sources). In order to enable ‘Lead Manager Access’ to be selectable, ‘Access to Personal/Private Customer Data (Deal Manager)’ must be set to ‘Yes,’ and the ‘Create & Save Credit Application’ permission must also be enabled. Without these two permission settings, ‘Lead Manager Access’ will remain greyed out and disabled. |
,’ Create & Save Credit Application,’ and ‘Lead Manager Acces’")
Captive IDs For User
If the user has a Captive ID, enter it in the ‘Captive IDs for this User’ section. This ID will be used to log into your Captive portal.

Third Party IDs For User
If the user has any third-party IDs, enter them in the ‘Third Party IDs for this User’ section.
This will enable the individual user to seamlessly access their third-party programs by allowing them to log into those programs from RouteOne.

Saving and Creating the New User
After inputting all necessary information and permissions, click the ‘Save Information’ button at the bottom of the page.
A screen will appear with the message ‘Dealer User Created Successfully.’ The user’s RouteOne User ID will also be noted in this message.
Creating and saving a new user will automatically associate that user with your dealership.
Important: Contact the new user and provide them with their RouteOne User ID and temporary password. The user will need to log in and set their new password.
instructions for logging into routone
Associating a User With Your Dealership
From the ‘Admin’ top navigation tab, select ‘Users’ from the dropdown menu to navigate to the ‘Users’ page.
If you already created and saved a new user, that user will be automatically associated with your dealership.
However, if you need to associate a user with your dealership, click the ‘Associate User’ button on the ‘Users’ page. You will be navigated to the ‘Associate User’ page.
You will only be able to associate users that you yourself previously created.
In the ‘Search By’ dropdown menu, select to search by User Name, User ID, or Captive ID. Input the information and click ‘Search.’
When you locate the user you would like to associate, click the ‘Select’ button under the ‘Actions’ column.
Click the ‘Save Information’ button at the bottom of the page to apply your changes.

Editing a User
From the ‘Admin’ top navigation tab, select ‘Users’ from the dropdown menu to navigate to the ‘Users’ page.
If you need to edit a previously created user, click the ‘Edit’ button next to the user. You will be navigated to the ‘Edit User’ page.
From this page you can also edit the user’s password by completing the ‘New Password’ and ‘New Password Confirm’ fields.
Edit the desired information or permissions for the user. For detailed permissions information, refer to the following sections in this guide:
- Permissions - General
- Permissions - Credit, Compliance, Desktop, Deal Jacket
- Permissions - eContracting
- Permissions - Signatures Only
- Permissions - Digital Retail Services
Important: Remember to click the ‘Save Information’ button at the bottom of the page to apply your changes.

ROUTEONE SUPPORT
Hours (EST)
Monday - Friday: 6:00am – Midnight
Saturday: 9am – 9pm
Can’t find what you need?
Try our search
