In This Guide:
Related Guides:
Compliance
Dealer Compliance Dashboard
Please note that the Compliance Dashboard is not intended to serve as legal advice that your dealer group is compliant with applicable legal and regulatory obligations; rather, it is only intended to be a tool to help your dealership manage compliance. The Compliance Dashboard is not a substitute for your dealership’s compliance counsel.
What is the Dealer Compliance Dashboard and how do I find it?
The RouteOne Dealer Compliance Dashboard provides a single location where you can visually understand how your dealership is managing compliance. From this page you can also take action on every deal for any and all compliance products provided by RouteOne.
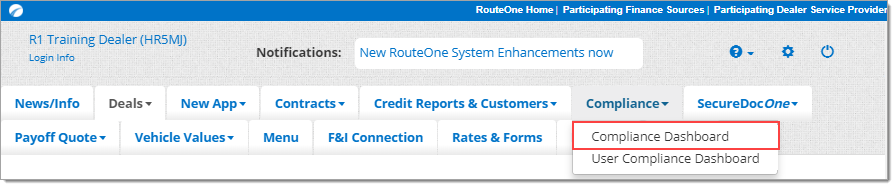
To access the Dealer Compliance Dashboard, click the ‘Compliance’ navigation tab, and select ‘Compliance Dashboard’ from the dropdown.
To access this page, users must have the ‘Compliance Dashboard Access’ permission enabled.
The Dealership System Administrator (DSA) for your dealership will need to make any changes to these preferences. More information on editing and enabling user permissions can be found here.
Understanding the Dashboard
The Dealer Compliance Dashboard displays charts for each product, with two possible statuses: ‘Compliant,’ or ‘Not Compliant.’
View the full list of rules that determine if a deal is ‘Compliant’ or ‘Not Compliant’ for a specific compliance product.
Please note that the ‘Compliant’ and ‘Not Compliant’ statuses reflect compliance with these rules, not with applicable laws and regulations.
The Dealer Compliance Dashboard also displays a ‘Total Compliance’ pie chart. For deals to be listed as ‘Compliant,’ in this chart, they must be 100% compliant with the applicable rules across all compliance products.
- If any individual RouteOne compliance product is not compliant for a deal, the deal will be tracked as ‘Not Compliant’ in the Total Compliance pie chart.
For this reason, it is possible for the Total Compliance pie chart to show 0 ‘Compliant’ deals, even if some of the individual product pie charts have deals that are ‘Compliant’ for that particular compliance product.
You can customize which products you would like RouteOne to track by using the ‘Selected’ dropdown on the right side of the screen.
The products you decide to track in the Dealer Compliance Dashboard will be saved to your individual user ID only. Each user can customize the products they would like to track, and those selections will be saved to their user ID.
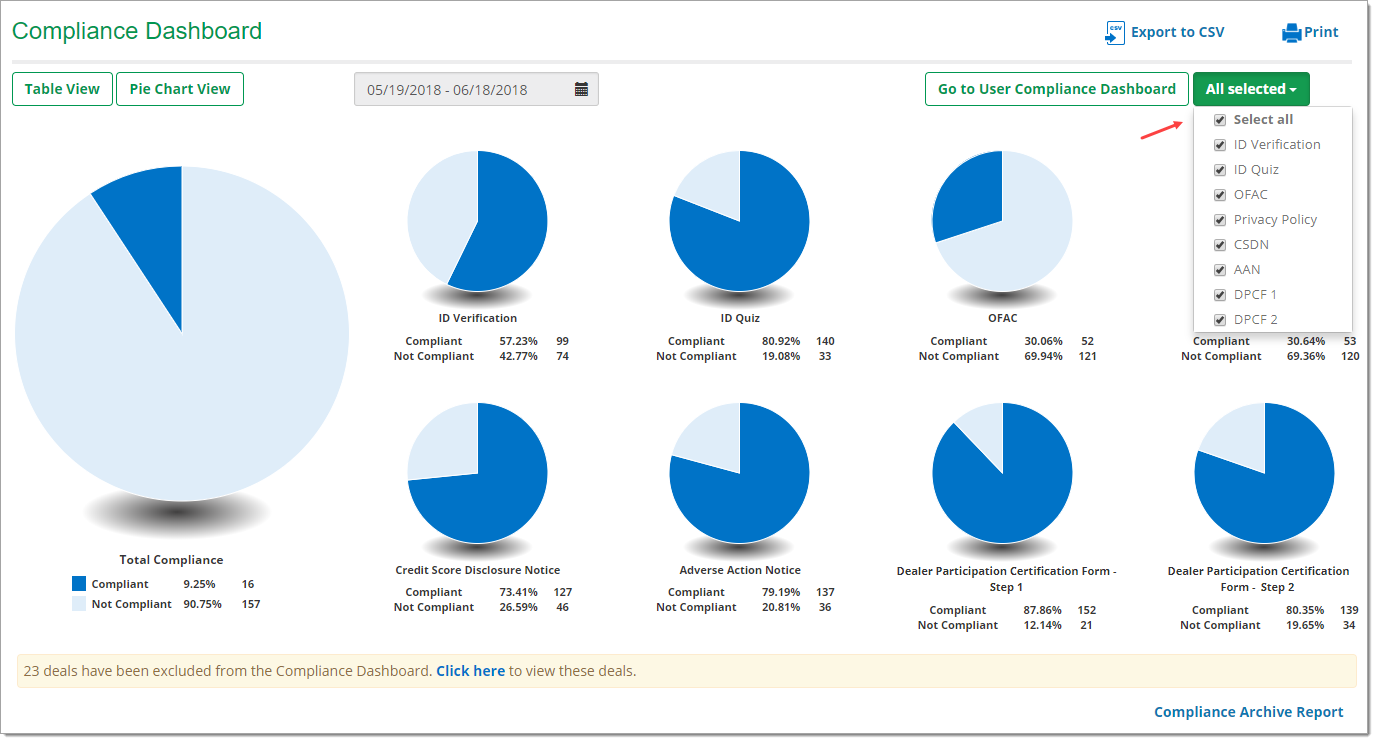
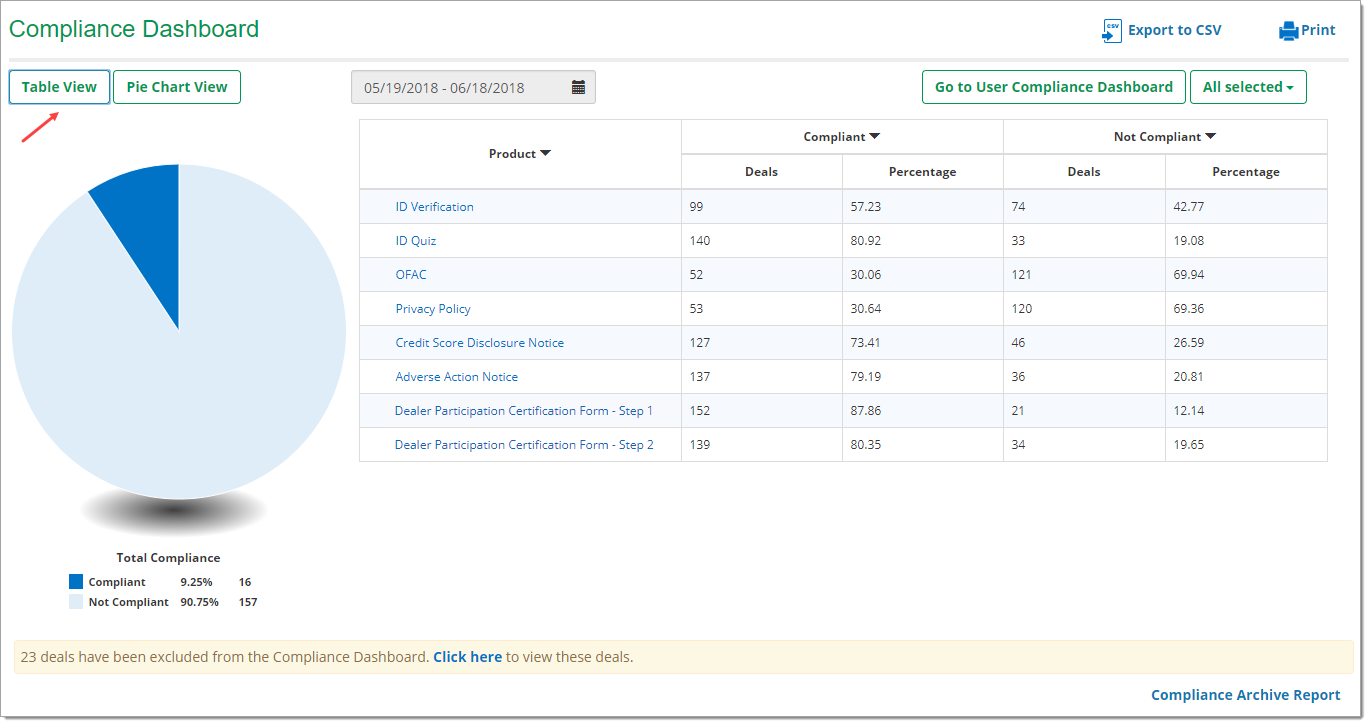
You can also customize if you would like the page to display in ‘Table View,’ or ‘Pie Chart View.’
The data in ‘Table View’ and ‘Pie Chart View’ remains the same. It is simply displayed differently. Be sure to check out the different views as you continue to incorporate the Dealer Compliance Dashboard in your day-to-day work.
Table View of Dealer Compliance Dashboard
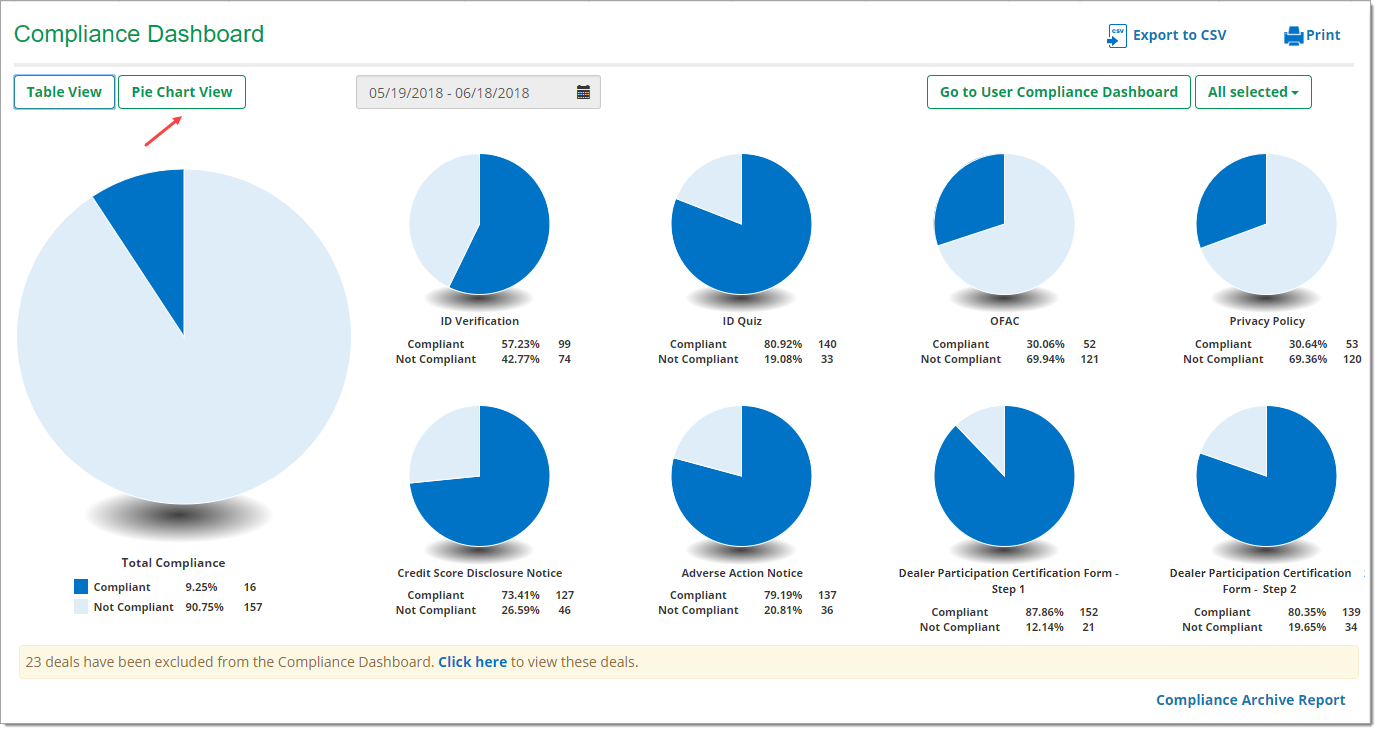
Pie Chart View of Dealer Compliance Dashboard
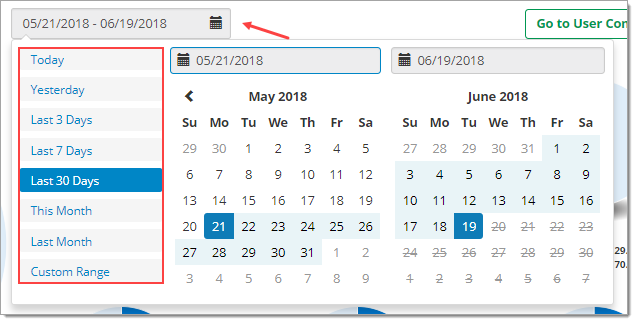
At the top of the page, you can click on the date range selector to determine which deals you would like to view in the Dealer Compliance Dashboard. Select from different preset options, or select a custom range. You can review deals as far back as 90 days.
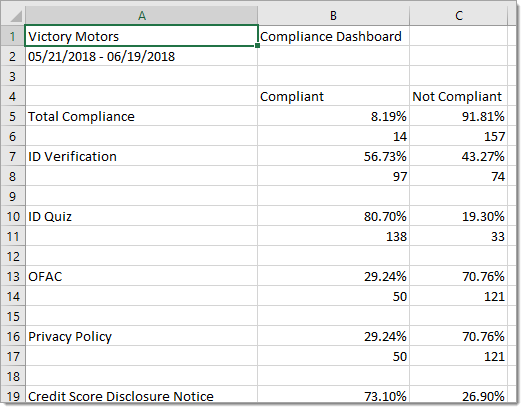
If you would like to save your Dealer Compliance Dashboard data outside of the RouteOne system, you can export to a CSV file, or print the page. Click on either of these options in the upper righthand corner of the page.

How the Dealer Compliance Dashboard Looks When Exported to CSV
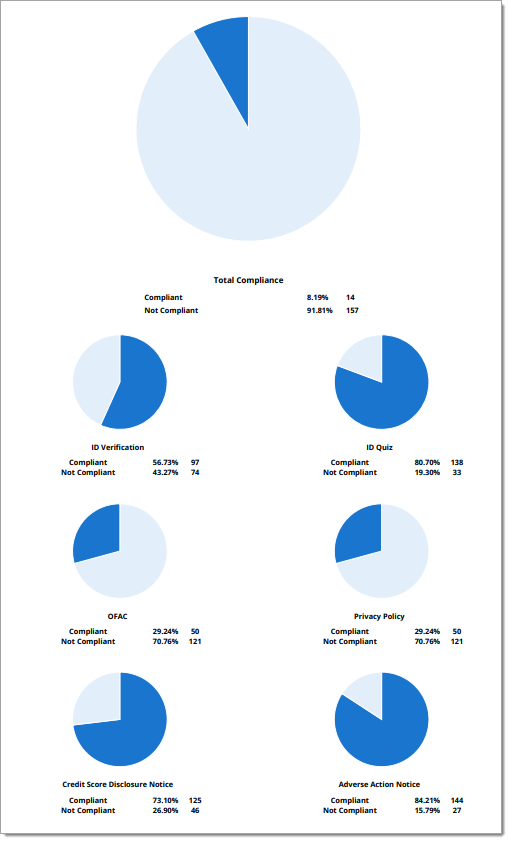
How the Dealer Compliance Dashboard Looks When Printed
Using the Dashboard
In the Dealer Compliance Dashboard, the individual compliance product pie charts are a quick and easy way to compare how many of your deals are ‘Compliant’ versus ‘Not Compliant.’
To access deals that are ‘Not Compliant’ for each product, simply click on each pie chart. Note that clicking on a pie chart will only show ‘Not Compliant’ deals.
For this example, click on the OFAC pie chart.

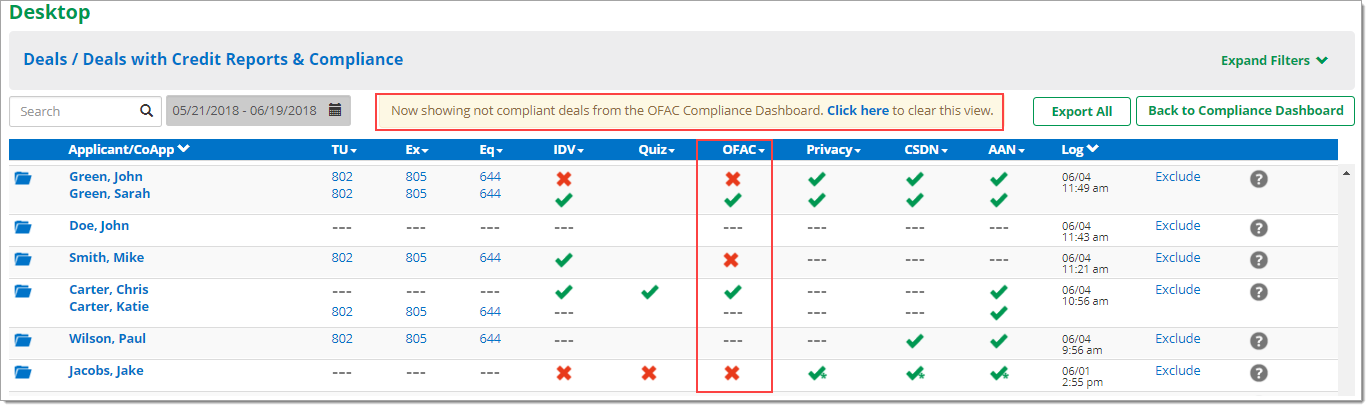
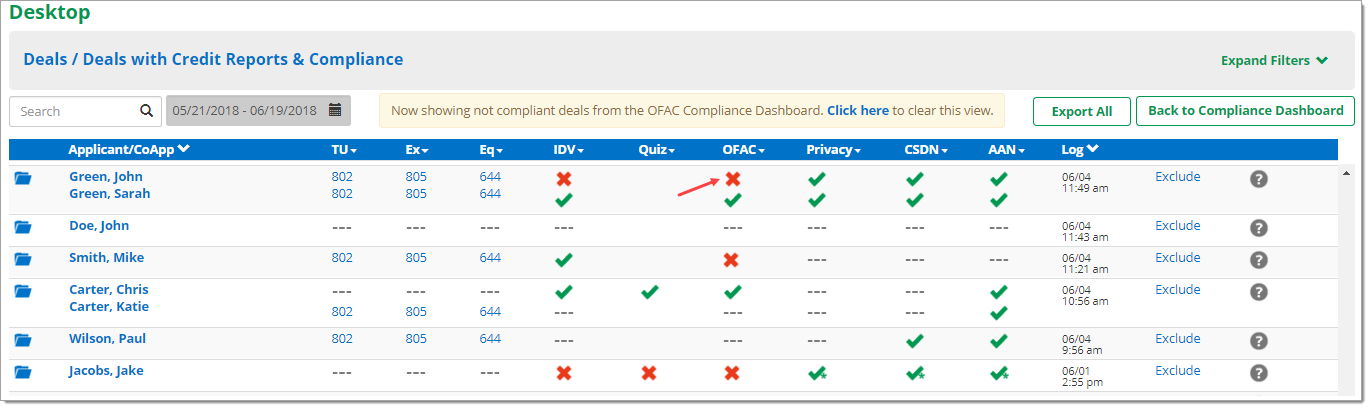
Clicking on the OFAC pie chart will navigate you to Desktop, where you will see all of your deals that are not compliant for OFAC.
In this example, there are 3 failed OFAC transactions, and 3 OFAC transactions that were not completed (as indicated by the ‘---‘ null icon). This makes 6 deals that are ‘Not Compliant’ for OFAC.
If there is a co-applicant for a deal, OFAC must be run and passed for both the applicant and co-applicant. Otherwise, the deal will not be compliant for OFAC.
Review the full list of rules that determine if a deal is ‘Compliant’ or ‘Not Compliant’ for a specific compliance product.
You can easily manage deals that are ‘Not Compliant’ directly from this page. Click on a failed icon to run the transaction again (or manually override it), or click a ‘- - -‘ icon to run the OFAC transaction.
Once the transaction is successfully passed (or manually passed via a dealer manual override), the deal will be marked as ‘Compliant’ and will no longer display in the list of ‘Not Compliant’ deals within the OFAC Compliance Dashboard.
For this example, click the failed icon for ‘John Green.’
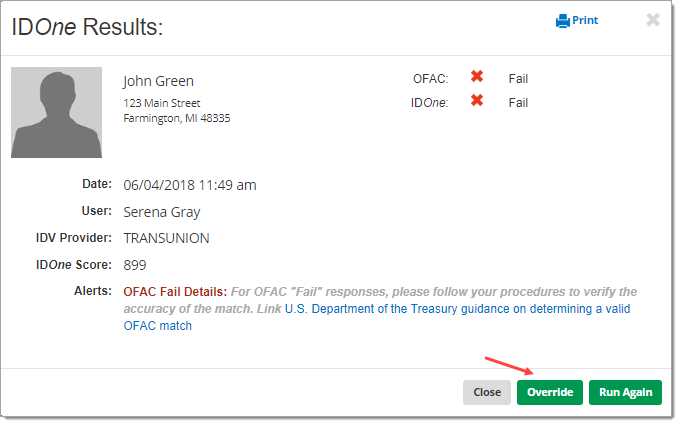
You will be presented with the IDOne results that you can either ‘Override’ or ‘Run Again.’ For this example click ‘Override.’
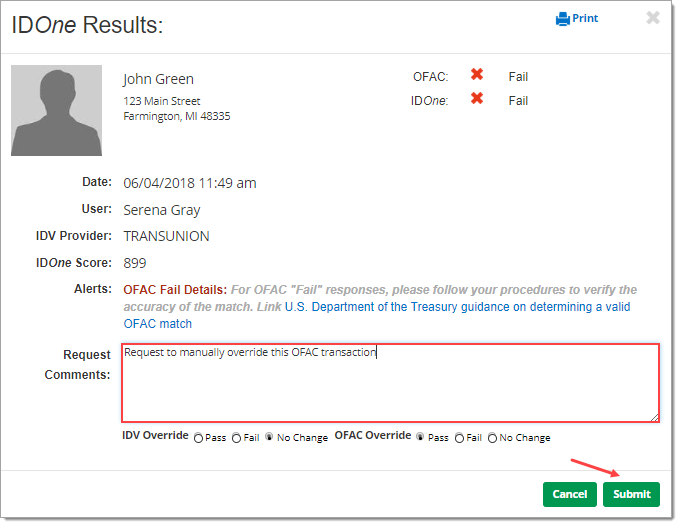
You can add ‘Request Comments’ in the text box. Click ‘Submit’ when you are finished.
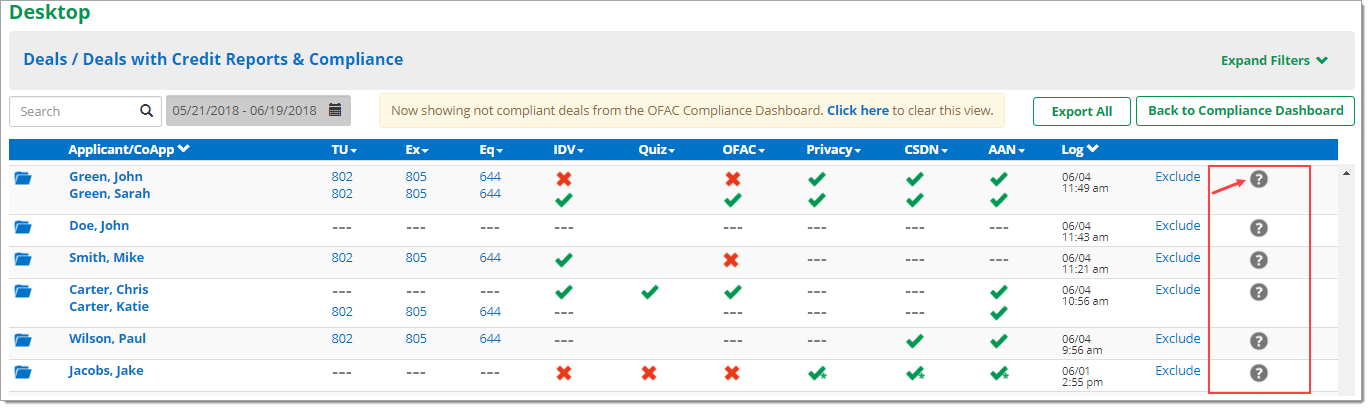
You will return to Desktop where you can see that John Green no longer displays in the ‘Not Compliant’ list. The deal is now ‘Compliant’ for OFAC, due to the manual override.
Once you have taken the steps to make your deal ‘Compliant,’ the deal may not disappear from the ‘Not Compliant’ list immediately. You may simply need to return to the Dealer Compliance Dashboard, and click on the compliance product name (either pie chart or the name from the table), to reload the list of ‘Not Compliant’ deals for that compliance product. The deal you recently made ‘Compliant’ will no longer appear on your ‘Not Compliant’ list.
This process of navigating to the deals that are not compliant for each compliance product can be repeated for each compliance product that RouteOne offers. Simply click on the product pie chart, take actions on Desktop, and your deals will transition from ‘Not Compliant’ to ‘Compliant.’
Compliance products include:
- ID Verification
- ID Quiz
- OFAC
- Privacy Policy
- Credit Score Disclosure Notice
- Adverse Action Notice
- Dealer Participation Certification Form (Step 1 and Step 2)

Why is a deal marked ‘Not Compliant?’
Simply click the question mark icon on the right side of Desktop, for the deal you want to know more about.
This will tell you what products the customer is not compliant for, and what steps to take in order to make the customer compliant.
Review the full list of rules that determine if a deal is ‘Compliant’ or ‘Not Compliant’ for a specific compliance product.

Excluding Deals from the Dashboard
If at any time you want a deal to be excluded from being tracked in the Dealer Compliance Dashboard, you can easily accomplish this by clicking the ‘Exclude’ link that displays on Desktop.
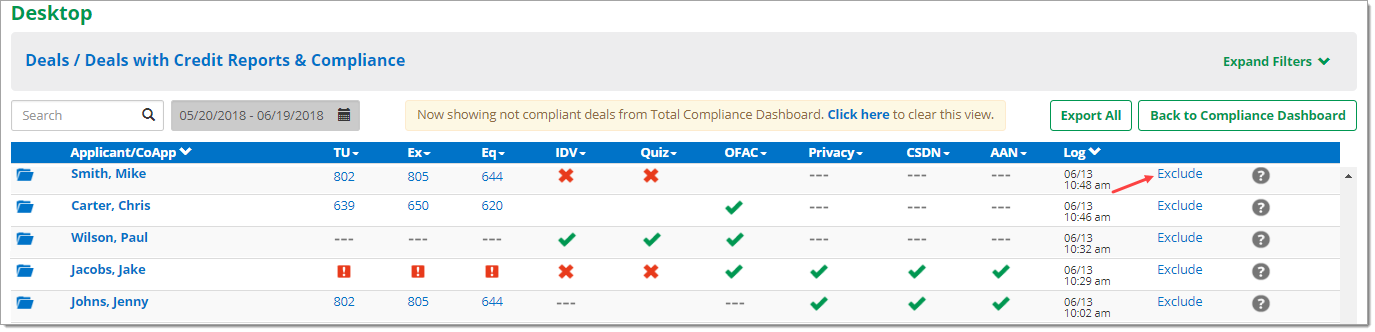
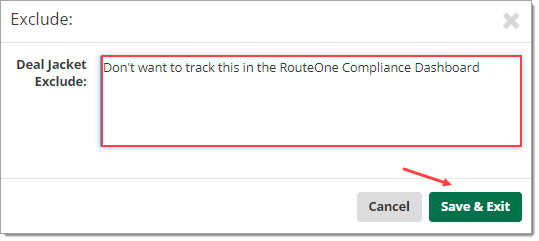
Once you enter a comment and save, the deal will be completely excluded from the Dealer Compliance Dashboard.
It will not be marked as ‘Compliant’ or ‘Not Compliant,’ as it will be ignored by the Dealer Compliance Dashboard.
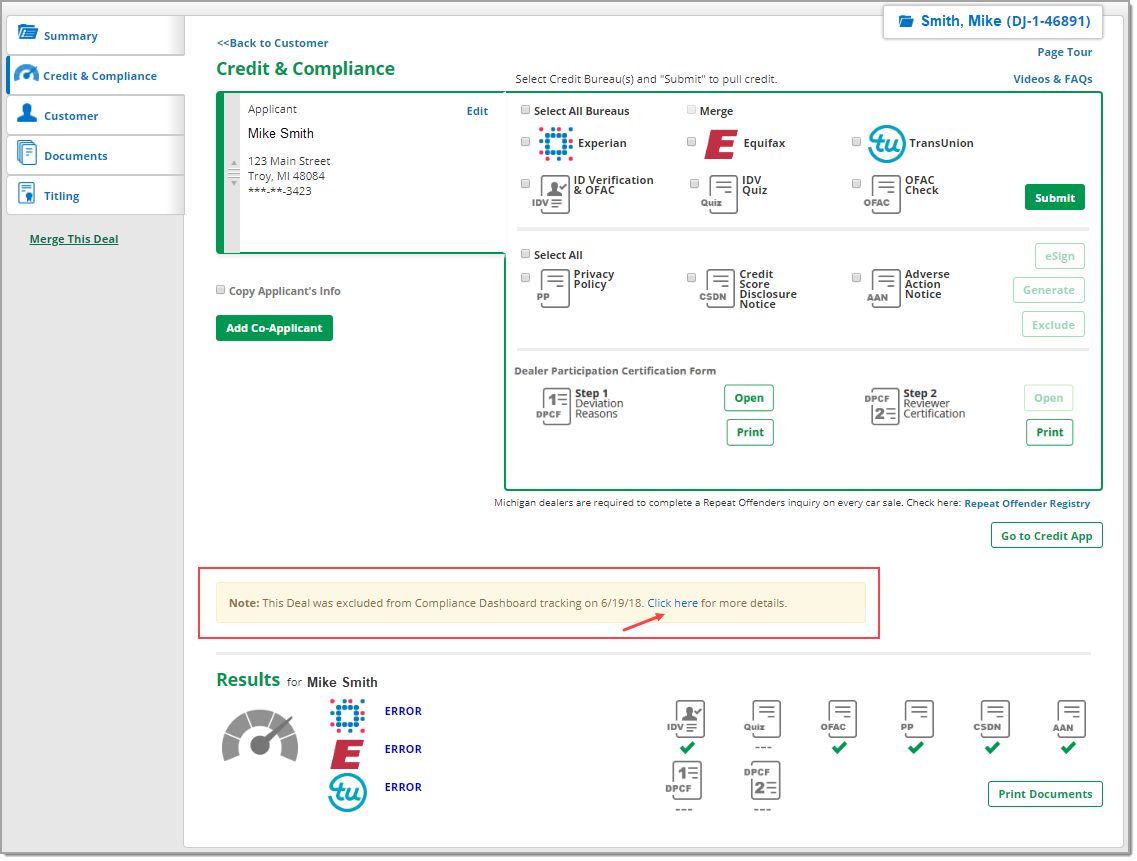
To find deals that have been excluded, navigate to the Deal Jacket, then the Credit & Compliance tab. You will see a message in yellow, noting that the deal was excluded from the Dealer Compliance Dashboard. Click the message for more details.
Recall that the Deal Jacket is a blue folder found next to a deal, and can be found on pages such as: Deal Manager, Desktop, the Decision Summary page, and App Manager.
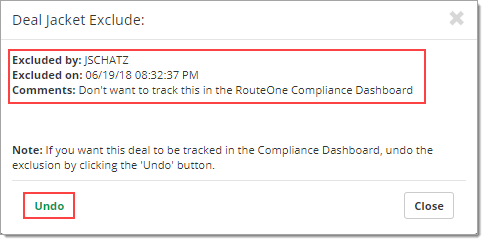
You will see who excluded the deal, when it was excluded, and the comment entered about why the deal was excluded.
You also have the option to undo the exclusion by clicking the ‘Undo’ button. Clicking ‘Undo’ will revert the deal back to the original statuses for that customer, which will be used to determine if the deal is ‘Compliant’ or ‘Not Compliant’ in the RouteOne Dealer Compliance Dashboard.
Any user that has the ‘Compliance Dashboard Access’ permission will be able to ‘Exclude’ Deal Jackets, and any user with ‘Compliance Dashboard Access’ permission can ‘Exclude’ and ‘Undo’ any deal as often as desired.
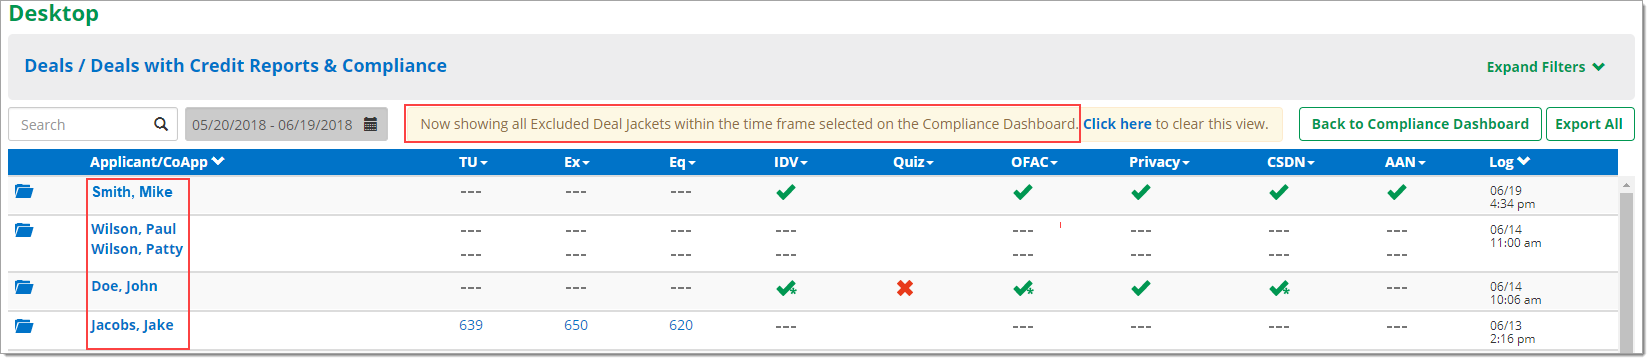
If, at any time, you need to review all the deals that have been excluded from the Dealer Compliance Dashboard, simply click on the yellow message at the bottom of the Dealer Compliance Dashboard page.

You will navigate to Desktop, where you will see all the deals that have been excluded from the Dealer Compliance Dashboard.
ROUTEONE SUPPORT
Hours (EST)
Monday - Friday: 6:00am – Midnight
Saturday: 9am – 9pm
Can’t find what you need?
Try our search
